Forest photography is one of the most magical experiences you can have as a photographer. The interplay of natural light filtering through the treetops, morning mist, leaf strewn paths, and the sense of intimacy with nature make this environment a perfect setting for capturing images that evoke emotion and mystery. But if you’ve ever found yourself in the middle of the forest unsure where to start, or feeling like all your shots look the same, this article is for you.
As photography professionals, we understand how challenging it can be to transform such a vast and organic space into a series of powerful, unique compositions. That’s why we’ve put together five ideas that will not only inspire you but also help you make the most of your outdoor sessions. Whether you’re working with models, shooting editorial portraits, or capturing the essence of the landscape, these creative proposals will encourage you to see the forest with fresh eyes and tell memorable visual stories.
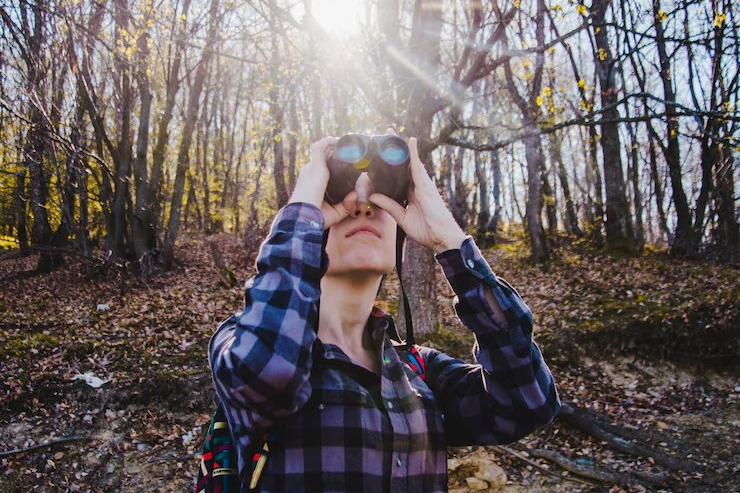
1. Use the natural light between the trees


One of the most powerful elements when photographing in the forest is the filtered natural light. Unlike open environments, forests offer far more dynamic and ever changing lighting thanks to the foliage. Leaves act as natural diffusers, allowing sunlight to filter through softly and directionally, creating unique textures, highlights, and shadows. The golden hours—sunrise and sunset—are perfect for capturing that warm, magical light that elevates your compositions. Even midday can work if you play with the strong contrasts cast on the ground or your subject’s face.
As a photographer, you can use these beams of light to guide the viewer’s attention and give your image a narrative sense. For instance, positioning your subject where a shaft of light falls can create a theatrical or mystical effect. This type of lighting helps emphasize the face or specific parts of the body, adding drama and depth. Using smoke or mist, through a fog machine or handheld vaporizer, makes the light beam even more visible, enhancing the dreamlike atmosphere of the scene.
Another highly effective technique is backlighting, where you place the light source behind the subject to create well defined silhouettes or a glow along hair and edges. This approach is ideal for conveying emotion or introspection. In editorial or conceptual portrait sessions, backlight naturally separates the subject from the background, ensuring they don’t get lost among the trees. Portable reflectors,or even a simple white sheet,can help fill in shadows on the face without losing the immersive quality of the natural light.
Finally, remember that the forest is a constantly changing environment: light shifts with the weather, season, and time of day. Explore different angles, heights, and compositions. Lying on the ground to capture light from below or climbing a small elevation can completely transform your shot. Practice, experiment, and take the time to observe how light behaves in every corner. The key is patience and attentiveness, being ready for those moments when nature aligns to gift you an unforgettable image.

2. Incorporate elements from the surroundings as accessories


The forest is a setting that goes beyond serving as a simple backdrop, it’s an endless source of visual elements you can integrate directly into your photos. Think of fallen leaves, branches, wildflowers, stones, mushrooms, pinecones, or even tree bark. Each of these details offers textures, shapes, and colors that can enrich the visual narrative of your image. Using them as props, natural frames, or even part of your model’s styling gives your photography a more organic, artistic character, strengthening the connection between subject and environment.
A creative way to apply this is by crafting crowns or floral headpieces from elements collected on site, which you can use to style your model and enhance the natural aesthetic. You can also play with out of focus leaves in the foreground (bokeh) to frame your subject’s face or body. This technique adds depth and creates the feeling that we’re peeking into an intimate, almost magical scene. Even simple objects like a dry branch can cast interesting shadows on the face or background. The key is to think beyond conventional approaches and observe carefully what nature offers you.
Remember that these elements can also help tell a story or convey emotion. For example, a model hugging a moss covered log can suggest nostalgia, connection, or melancholy. A portrait with falling leaves creates movement and evokes a sense of change or transformation. Textures play an equally important role: photographing someone lying on a bed of autumn leaves or walking barefoot on stones can trigger an emotional response in the viewer, making them feel part of the scene.
One important tip: always respect the natural environment. Don’t pull up live plants or disturb the ecosystem just for a shot. As professional and responsible photographers, we must honor the spaces we visit and promote sustainable practices. Whenever you incorporate forest elements into your compositions, do so ethically and consciously. Nature is your ally, not disposable scenery. And once you learn to see it with a fresh perspective, you’ll discover that often, the simplest elements have the greatest impact.

3. Create portraits with fog or smoke for a dramatic effect


Few elements create as enigmatic an atmosphere as fog drifting between trees. This natural phenomenon, when present, transforms any scene into a visual story brimming with mystery, depth, and emotion. Since real fog isn’t always available, you can achieve a similar effect using portable smoke machines, vaporizers, or even atmospheric particles in post production. The goal is to introduce an ethereal element that adds texture to the air and softens the background, making your subject stand out dramatically.
Smoke acts as a natural diffuser, reducing contrast and enveloping the scene in soft, even light. This makes it an excellent tool for portraits where you want to convey introspection, fantasy, or even drama. Position the smoke behind your subject to mingle with natural light beams and create a halo effect, or use it in motion to capture dynamic shapes. Shoot in bursts and constantly change angles, as smoke shifts quickly and each frame will be unique.
This technique works particularly well for narrative or conceptual themes. For example, pairing flowing garments or long layers with the smoke enhances the sense of unreality. A model walking slowly through the fog, glancing back, or emerging from it can tell a powerful visual story without words. To elevate the production value, combine smoke with hidden LED lights behind the trees or warm lamps that create dramatic focal points in the mist.
That said, working with smoke requires preparation and safety precautions. Ensure smoke machines are rated for outdoor use and don’t pose a fire hazard, especially in dry areas. Keep water on hand and respect local regulations where you shoot. If relying on natural fog, arrive early, just before sunrise, when temperatures are low and vapor hasn’t yet dissipated. With patience, creativity, and planning, this technique can transform an ordinary session into an editorial quality image.

4. Use roads and trails as guide lines


One of the most powerful compositional tools in photography is the use of leading lines to guide the viewer’s eye. In a forest, paths, trails, and natural walkways provide a perfect opportunity to apply this principle in an organic and compelling way. Whether it’s a dirt trail covered in fallen leaves, a narrow path flanked by towering trees, or a rustic bridge among vegetation, these elements add depth and structure to your image, giving it a clear sense of direction and visual movement.
Positioning your subject along a path creates a sense of journey or transition that can be interpreted in multiple ways: exploration, introspection, or even fantasy. Placing them walking toward the camera produces a direct, intimate feel, while walking away evokes mystery and melancholy. If you experiment with overhead (cenital) shots, the trails become graphic strokes within the landscape, perfect for adding an artistic or editorial touch to the composition.
Beyond their compositional value, paths help simplify the frame and organize visual elements. In a forest, where vegetation can be dense and chaotic, a trail acts as a “clean” space that contrasts with the background, allowing the subject to stand out more clearly. This visual contrast improves the legibility of the image and makes the final result more impactful. You can enhance this effect using wide apertures (f/2.8 or lower) to blur the background and focus attention on the main point of interest.
Extra tip: play with the symmetry or curve of the path. A straight, well aligned trail can convey balance and calm, while a winding path adds dynamism and flow to the scene. Remember, not everything has to be centered; using the rule of thirds can work beautifully if the path enters or exits from one side of the frame. The key is to treat the forest’s geography as a narrative tool, capable of guiding the story you’re telling through your lens.

5. Capture the movement: leaves, fabrics, or models in action
Although forests often evoke calm and stillness, they can also serve as a perfect stage for capturing movement and energy. Incorporating elements in motion—such as falling leaves, flowing fabrics, or models mid jump or spin—adds dynamism to your images and breaks the stiffness of static poses. Photos like these have the power to convey intense emotions, from freedom and joy to melancholy or transformation. The best part is that, when planned carefully, movement can dramatically enhance the visual impact of a photograph.
One of the simplest ways to introduce motion is by using long, airy fabrics, either as part of the wardrobe or as a scenic accessory. You can ask your model to wave a piece of fabric while walking or spin in place to create ripples and lines in the air. This works especially well in backlit shots, as the sheer material produces striking silhouettes. Another approach is to harness natural wind or generate airflow using an assistant and a large reflector, allowing the fabric to move gracefully.
Movement in nature itself can also become a compelling subject: falling leaves, swaying branches, suspended dust, or even raindrops. To capture these moments, adjust your shutter speed according to the effect you want. To freeze action, use fast speeds (1/1000s or higher). If you prefer an artistic blur that conveys motion, slow down the shutter (1/30s or lower) and follow the action with a panning shot. When executed skillfully, this technique can add a poetic and original touch to your images.
Finally, encourage your model to move freely. Jumping, running, spinning, or simply walking while focusing on a specific emotion can produce spontaneous, authentic results. Give clear guidance, but allow room for improvisation within the environment. Many of the best shots happen between poses, when the body is relaxed and gestures feel natural. For self portraits, use a remote or a timer with burst mode to capture multiple stages of movement without worrying about perfect timing.
Incorporating motion into your forest sessions not only adds visual variety but also conveys life, energy, and genuine emotion. It’s an excellent way to make your work stand out and forge a deeper connection with your audience.

Explore new techniques for stunning photos
Mastering forest photography goes beyond technical skill: it’s about connecting with your environment, observing with sensitivity, and knowing how to translate that connection into memorable images. If you’ve made it this far, you now have five actionable ideas to try on your next outing, but this is just the beginning. The forest is a stage that transforms with each season, with every shift of light, and your abilities as a photographer must evolve alongside it. We encourage you to keep exploring, push yourself beyond the conventional, experiment, and tell visual stories that resonate with authenticity.
To continue growing as a photographer, we recommend two key courses available on our platform. The Curso de Creación de Retrato Conceptual is perfect if you want to elevate your forest sessions to a more artistic level, learning how to build scenes that tell a story. And if your goal is to master lighting in any natural setting, the Curso Online de Iluminación Fotográfica y Retrato con Eloy Mora provides the tools you need to illuminate effectively and creatively. Be sure to explore other blog articles as well, and keep feeding your inspiration, the photographic adventure is only just beginning.


